Free
Bead Board
Turn a photo or an idea into a fuse-bead pattern you can click to edit, print at true size and really make.
Install
Install the "Bead Board" skill into ~/.claude/skills/bead-board.
Download each file and save it under that folder:
https://skilllift.pages.dev/packs/bead-board/SKILL.md → SKILL.md
https://skilllift.pages.dev/packs/bead-board/references/style.md → references/style.md
https://skilllift.pages.dev/packs/bead-board/assets/engine.cjs → assets/engine.cjs
https://skilllift.pages.dev/packs/bead-board/assets/editor.html → assets/editor.html
https://skilllift.pages.dev/packs/bead-board/assets/glyphs.json.gz → assets/glyphs.json.gz
https://skilllift.pages.dev/packs/bead-board/assets/fonts-license.txt → assets/fonts-license.txt
https://skilllift.pages.dev/packs/bead-board/scripts/make.mjs → scripts/make.mjs
https://skilllift.pages.dev/packs/bead-board/scripts/check.mjs → scripts/check.mjs
Then read SKILL.md, tell me what it does, and remind me to start a new session.
Unpack it into ~/.claude/skills
Same skill, different brief
The left is the preview. The right was made by a separate agent from a different brief, using only the installed skill and without seeing the preview.
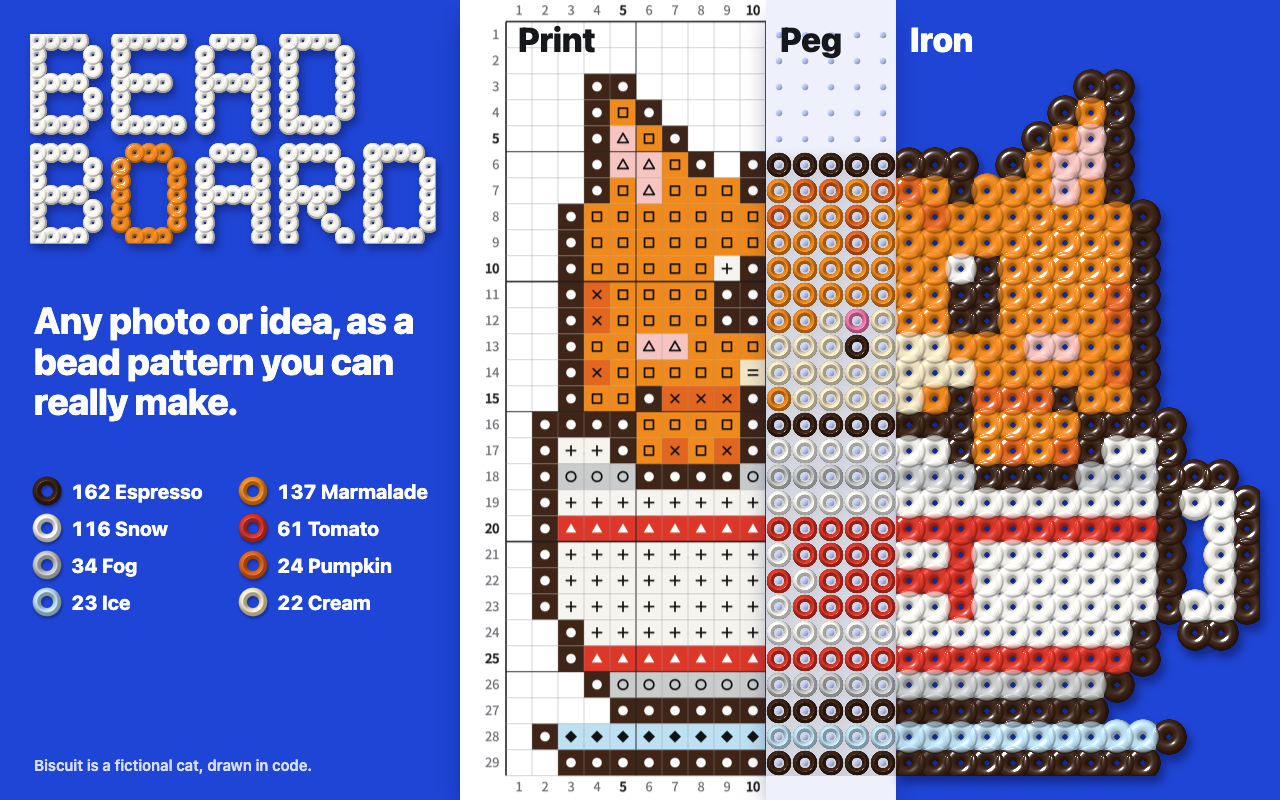
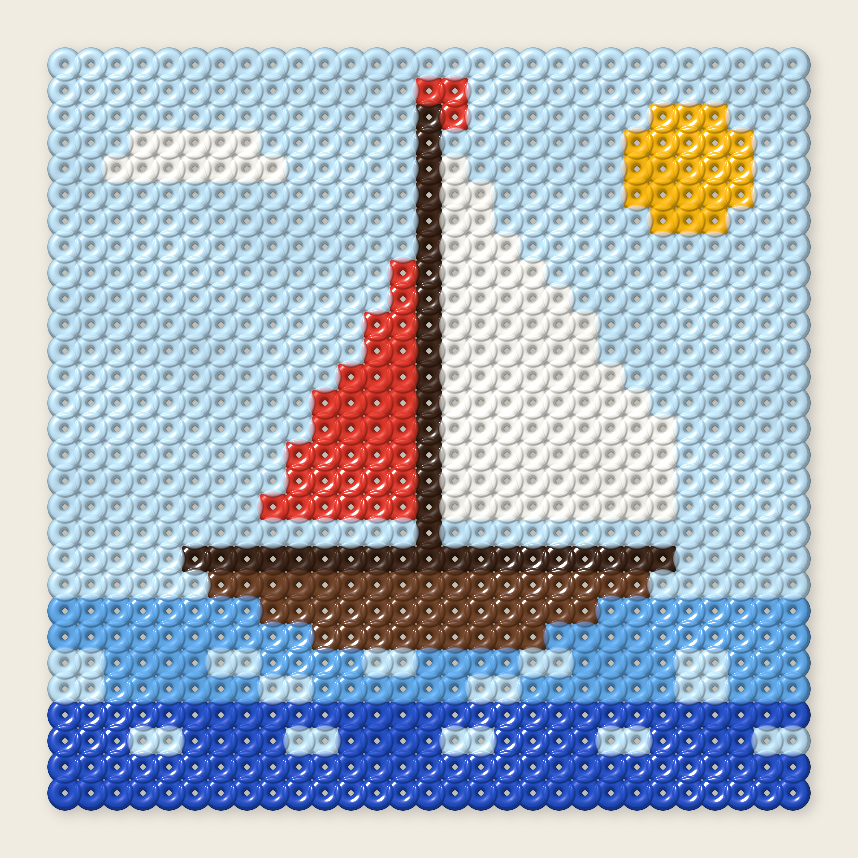
One test run on a fictional brief. Letterforms can differ on systems without the same fonts.
Turns a photo, or an original idea drawn in code, into a fuse-bead pattern a person can actually make. Delivers a clickable editor where every bead can be changed, a PDF that prints at true size (5 mm per bead) with grid, numbers and symbols that work in black and white, a bead count by colour, and a picture of how the ironed piece will look. Use when someone wants a bead pattern, fuse beads, melty beads, ironing beads, a pixel craft from a photo of their pet or child, or a craft sheet for a class.
What it must pass before delivery
scripts/check.mjspasses on the output folder.- You have looked at
finished-preview.pngand it reads as the subject. - You have viewed every PDF page: nothing overlaps, and symbols are legible.
looseBeadsis 0, or you told the person which parts will fall off.- The subject is original or theirs, with no copyrighted character.
- Anything fictional is labelled with
--note. - You told them to print at "Actual size" and to check the 10 cm line with a ruler.
- You told them colours are approximate, and that ironing and print size haven't been tested on paper.
- For a full scene,
emptySquaresis 0 and noshortRowsare listed, or you meant them. A pale subject still shows at thumbnail size. - The words they see are plain: no technical terms.
Read the full SKILL.md
---
name: bead-board
description: Turns a photo, or an original idea drawn in code, into a fuse-bead pattern a person can actually make. Delivers a clickable editor where every bead can be changed, a PDF that prints at true size (5 mm per bead) with grid, numbers and symbols that work in black and white, a bead count by colour, and a picture of how the ironed piece will look. Use when someone wants a bead pattern, fuse beads, melty beads, ironing beads, a pixel craft from a photo of their pet or child, or a craft sheet for a class.
version: 1.1.0
---

# Bead Board

You make a real pattern for a real table. The look and the maths live in the files: `assets/engine.cjs`, `assets/editor.html`, `scripts/make.mjs`. Do not rewrite them or draw your own PDF. Read `references/style.md` for colour names and tokens.

Everything runs on the person's own computer, with Node 18 or later and nothing to install. A run takes about a second.

## If the person just wants the result

Most people asking for this are not technical. Do all the setup yourself. Ask plain questions, once, in one message, and never use the words quantise, dither, palette, pitch, JSON or terminal with them.

Ask only what the brief has not told you:
1. What should it show? A photo they send, or something they describe.
2. How big? Offer: "Small square, 29 beads across, about 14.5 cm. It takes about an hour or two" or "Large, 57 across, about 28.5 cm, a long project."
3. What beads do they have? A general set, or tell you the colours they own.

Hand over the folder and say in one or two sentences what is inside: open `index.html` to change any bead, and print `pattern.pdf`, choosing "Actual size" or "100%". Do not show commands unless asked.

Always say this too, in your own plain words: **colours are approximate, and ironing and print size haven't been tested on paper.** The PDF is measured from the file, not from a printed sheet, and nobody has ironed the result. Tell them to measure the 10 cm line and iron a small piece first. The same note is on PDF page 1 and beside the bead list in the editor.

If nobody can answer, proceed: 29 x 29, the big box of colours, background removed when the picture allows it, stray beads tidied. List your assumptions in one short line.

## Copyrighted characters: decline kindly

Do not make patterns of characters, mascots or logos someone else owns, whether by name, by description or from a screenshot of them. Say so warmly and offer an original instead:

> I can't make a pattern of that character because it belongs to its creators. I'd love to make you something of your own in the same spirit: tell me what you like about it, and I'll draw an original creature with that feel.

Photos of the person's own pet, child, house or cup of tea are fine. A photo of a real person needs to be someone they have the right to use. Do not use any commercial bead brand's colour names or numbers: the colour names here are our own.

## Inputs

- **Subject:** an image file (PNG, JPG, and on a Mac also HEIC, WebP, GIF), or a description you draw yourself.
- **Board size:** beads across by beads down. Default 29 x 29.
- **Colours:** one of the ready sets, `big-box` (49), `first-box` (16), `soft`, `earth`, `greys`; or the exact colours they own.
- **Optional:** title, paper (`a4` by default, or `letter`), language, most colours to use, mini beads.

## Steps

### From a photo

```
node scripts/make.mjs --image photo.jpg --board 29x29 --title "Mochi" --max-colors 12 --out mochi
```

Useful options:
- `--palette first-box`, or a list: `--palette "snow,ink,tomato,#7FB2A0:Sea glass"`
- `--max-colors 12`: most people own fewer colours than they think. Start at 8 to 14 for photos.
- `--background auto|keep|remove`: `auto` removes a plain background and leaves a busy one alone, and the result says which happened (`background` in the output).
- `--cleanup 0|1|2`: 1 tidies stray single beads but keeps eyes and small bright dots; 2 is firmer.
- `--dither 0.5`: adds speckle to blend colours, 0 to 1. Fiddly to make. Use only when asked for a more photographic look.
- `--fit cover`: fill the board and crop, rather than showing the whole picture.
- `--lang zh`, `--paper letter`, `--sheet ink` (symbols only, saves ink), `--pitch 2.6` (mini beads), `--note "..."`.

### From an idea

Draw it yourself, as a grid. This gives far better results than anything else for small boards: at 29 beads every bead is a decision. Write a JSON file:

```json
{"title":"Tea cup","note":"Original drawing.","legend":{"k":"espresso","w":"snow","r":"tomato"},
 "rows":["..kkkk..","..kwwk..","..krrk..","..kkkk.."]}
```

Any character missing from the legend is an empty square: no bead goes there. Write every row the same length. Shorter rows are padded with empty squares, and the result lists them in `shortRows`; characters not in the legend are listed in `unknownKeys`. Fix both unless you meant them. Colours are names from `references/style.md`, or `#rrggbb`. Then run:

```
node scripts/make.mjs --grid drawing.json --out teacup
```

Drawing rules that make it look good:
- A dark outline one bead wide reads best. Use a dark brown rather than black on warm subjects.
- Eyes two beads wide and two or three tall, with one light bead for a highlight.
- Use a darker shade of the main colour for stripes and shadows, not a new hue.
- Keep everything joined side by side. A bead touching only at a corner, or a floating detail such as steam, falls off after ironing. The result reports `looseBeads`, which must be 0 unless the person accepts it.
- Build rows in code if the shape is symmetrical: write half, and mirror it.

Full scenes, such as a boat on the sea:
- **Fill the whole board.** Sky and sea only exist if they are real beads: an empty square stays bare board and the piece has a hole. For 29 x 29 that is exactly 29 rows of 29 characters, and `emptySquares` in the result should be 0.
- **Paint the scene first, then the subject over it.** In code: fill the rows with sky and sea, then write the subject's beads on top. It keeps every row the right length.
- **Keep a pale subject visible.** A white sail, cloud, snowman or swan vanishes on a pale sky. Do one of these: use a mid-tone sky (`sky` or `denim`, not `ice`), or put a one-bead outline around the pale shape in `pebble` or `denim`, or both. Never put `snow`, `cream` or `fog` directly against `ice`, `lilac` or `rice`. Then look at `finished-preview.png` shrunk to thumbnail size: if the edge of the subject goes, it is too faint.
- **Choose the background colour by the subject:** dark or warm subjects on `ice` or `butter`, pale subjects on `sky`, `denim` or `midnight`. Use two or three bands (sea in `cobalt` and `sky`) rather than speckle. Waves read best as a repeating step along one row, not as scattered beads.
- **Say what it costs.** A filled background is often more than half the beads (435 of 841 in one test boat). Tell the person the count, and offer the empty-background version if they would rather not buy that many.
- **Colours for a drawing:** if they named a number ("about ten"), use at most that many and say which you picked. Ask which colours they own only if you are asking anything else. Count them from the result's `colours` figure.

For photos: if a shine or highlight comes out as a messy blotch, lower `--max-colors`, raise `--cleanup 2`, or fix it by hand in the editor with Fill. There is no highlight switch.

### Then, every time

1. Run `node scripts/check.mjs <folder>`. Fix anything it reports. It measures the bead spacing, the page size and the 10 cm line from the PDF itself.
2. Look at `finished-preview.png`. Does it read as the subject? If not, change the board size, colour limit or drawing and run again. Do this before showing anyone.
3. View every page of `pattern.pdf`, and open `index.html`, at desktop and phone width where you can. To drive it, `npm install playwright` in a temporary folder (set NODE_PATH if needed). Useful handles: the board is `#board`, the colours are `#tray` and `#list`, the warning line is `#warn`, tools are `[data-tool="paint"]` and so on, views are `[data-view="ironed"]`. On a Mac, `qlmanage -t -s 1000 pattern.pdf` gives only the first page. For later pages use `pdftoppm` or `mutool` if present, or a few lines of Swift with CoreGraphics. If you truly cannot see a pattern page, say so to the person, and check the editor's Pattern view, which draws the same grid.

To change a finished pattern from the command line, edit `pattern.json` and run `make.mjs --from pattern.json --out folder`.

## What you hand over

- `index.html`: the editor. One file, no internet needed. Click a bead to change it, drag to paint, remove, fill, swap every bead of a colour, undo. If a change leaves a bead not joined side by side to the piece, it gets a red ring and a warning naming its row and column. A bead inside a filled area is joined to its neighbours and is fine. Switch between pattern, beads and ironed views. Drop in a new photo and change the size and colours. It remembers changes, and can print a new PDF, save a picture, and save a copy.
- `pattern.pdf`: first page has the bead list, a picture of the finished piece, a 10 cm check line and how to make it. Pattern pages follow, at true size, with every row and column numbered on all sides and thicker lines every 5 and 10. Large boards split across sheets, with a small map of which sheet is which.
- `finished-preview.png`: how it will look once ironed.
- `bead-count.csv`: the count by colour, for a shop or a spreadsheet.
- `pattern.json`: the pattern as data.

## When things are thin or different

- **A thin brief** ("a cat"): restate what you understood, draw an original one, and list what you decided (colours, size, pose). Never invent facts about a real pet or person.
- **Wants a different size:** rerun with a new `--board`. For an idea, redraw: never stretch a drawing.
- **A busy photo:** suggest cropping close to the subject. `--fit cover` helps. Below about 29 beads, faces lose likeness: say so and offer 48 or more.
- **A rare Chinese character in the title** prints using the reader's own font, and the result reports `fallbackFont: true`. Check it on the page.
- **A picture type that cannot be read:** the script says so. Ask for a PNG, or have them drop it into the editor, which reads whatever their browser reads.
- **No printer:** the pattern can be followed from the screen, using the numbers.

## Before delivering

- [ ] `scripts/check.mjs` passes on the output folder.
- [ ] You have looked at `finished-preview.png` and it reads as the subject.
- [ ] You have viewed every PDF page: nothing overlaps, and symbols are legible.
- [ ] `looseBeads` is 0, or you told the person which parts will fall off.
- [ ] The subject is original or theirs, with no copyrighted character.
- [ ] Anything fictional is labelled with `--note`.
- [ ] You told them to print at "Actual size" and to check the 10 cm line with a ruler.
- [ ] You told them colours are approximate, and that ironing and print size haven't been tested on paper.
- [ ] For a full scene, `emptySquares` is 0 and no `shortRows` are listed, or you meant them. A pale subject still shows at thumbnail size.
- [ ] The words they see are plain: no technical terms.

## When not to use it

Not for cross-stitch, diamond painting or knitting charts, whose counts and fabrics differ. Not for reproducing someone else's artwork or characters. Not for selling patterns of protected subjects.

## Requirements

Node 18 or later. No other software, account or network. Mac users also get HEIC and WebP through the built-in `sips` command; elsewhere, ffmpeg is used if present. Playwright is needed only if you want to drive the editor in checks.
Used in these workflows
- Make something for the kids step 2